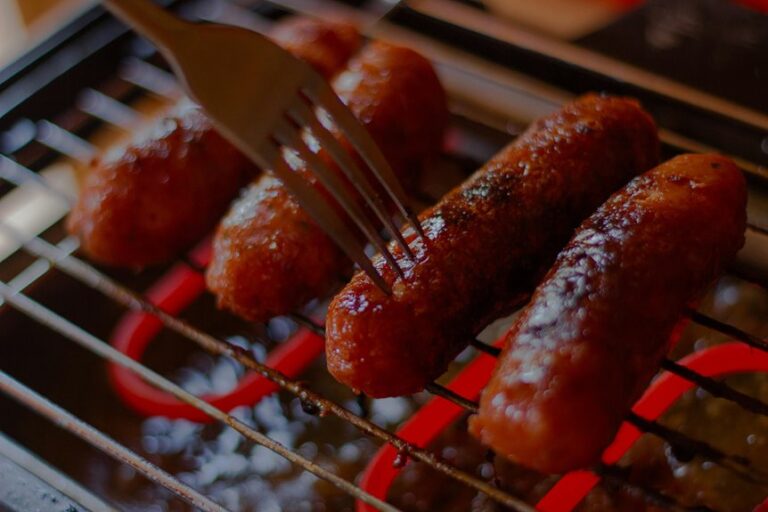
Yes, cook brats with the casing on. The casing helps the sausage keep its shape and stay juicy. It also gives brats that satisfying snap on the bite. A good casing should stay taut, not split or turn rubbery.
Do You Cook Brats With the Casing On?
Yes—you typically cook brats with the casing on, because that thin skin holds the sausage together, protects the juices, and gives you that satisfying snap once it’s cooked properly.
In sausage prep, you’ll find the casing isn’t a problem; it’s part of the brat’s identity. Don’t let casing myths fool you into believing it blocks flavor. Instead, it helps the meat stay plump and glossy as heat works through the links.
When you cook them over indirect heat initially, you’ll keep the skin from scorching while the inside finishes gently. Aim for 160°F, and you’ll get a brat that feels firm, looks golden, and tastes rich, smoky, and welcoming at the table.
Should You Remove Brat Casing Before Cooking?
No, you usually shouldn’t remove brat casing before cooking. The casing keeps your brat intact, so you can handle, turn, and brown it without turning dinner into crumbles.
In most sausage prep, leaving it on gives you a neater grill, a cleaner skillet, and a brat that feels like it belongs on the plate, not falling apart in the pan. Whenever you’re aiming for a juicy, classic bite, casing removal usually works against you.
Save that step for recipes where you want to stuff, crumble, or shape the meat yourself. Otherwise, cook the brat as packaged, then slice or split it after it’s done. That way, you stay with the crowd that knows a good brat should look proud and taste satisfying.
What Brat Casing Does for Texture
The casing gives a brat its signature snap, helping the sausage hold together while the juices build and stay locked inside. You get casing texture that feels taut, then gently yields, so every bite offers a clean pop instead of a mushy drag. That slight bite resistance makes each mouthful feel hearty and satisfying, like you’re sharing in a classic cookout moment.
Whenever you grill or pan-sear it, the skin turns bronzed and aromatic, adding a delicate chew that frames the rich pork inside.
- A glossy brat resting on warm grill grates
- A thin casing blistering to golden brown
- A fork pressing in, then springing back
- A initial bite with crisp skin and savory warmth
How Brat Casing Locks in Juices
That same thin casing does more than deliver snap—it acts like a little shield around the meat, trapping the brat’s juices as they heat and bubble inside. You get better juice retention because the casing barrier holds in fat and moisture, letting the sausage stay plump and succulent while it cooks.
As the links warm, their natural fats melt, mingle with seasoning, and baste the filling from within, so every bite tastes richer. That’s why you can count on a brat to feel juicy and satisfying when you cook it gently. Should you be after that classic backyard bite, keep the casing on and let it do its job. You’ll taste the difference in every mouthful, from the opening bite to the last.
Why Brat Casing Sometimes Splits or Shrinks
When brat casings split or shrink, it’s usually a sign that the heat climbed too fast or the sausage dried out before the center could catch up. You’ll notice tight skins as casings and humidity don’t stay balanced, especially after storage and aging have pulled moisture from the links. Natural casing needs gentle handling, because sudden steam builds pressure and stretches it past its limit. If the brat sits too long in warm air, the surface tightens like a drum while the meat inside lags behind. That mismatch can wrinkle, burst, or peel back.
- glossy links
- taut golden skins
- wisps of steam
- a juicy snap at outset bite
Best Cooking Methods for Brats With Casing
You can grill brats over indirect heat initially, then finish them for that crisp, snappy casing without burning the outside. Should you want extra juicy brats, try pan-searing them gently or simmering them initially, then browning them for a rich, golden crust.
Each method keeps the casing intact while helping the brat stay plump and flavorful at 160°F.
Grilling For Crisp Skin
For crisp-skinned brats, start them over indirect grill heat so the casing warms gently instead of scorching before the center cooks through. You’ll coax out a satisfying snap, especially provided your links already picked up a smoke finish. Keep the lid closed and let the fat render slowly, then slide them toward hotter grates for char marks.
- Golden casings glistening over ember glow
- Juices pulsing beneath a tight, bronzed skin
- Sizzling brats resting beside flickering grill flames
- A platter of smoky links with grill-striped edges
You’re aiming for 160°F inside, and the casing should feel firm, not tough. Turn them often, stay patient, and you’ll serve a crowd-pleasing brat that bites cleanly, smells incredible, and tastes like your backyard knows exactly what it’s doing.
Pan-Searing Juicy Brats
Should you want juicy brats with a crisp casing but don’t feel like firing up the grill, pan-searing does the job beautifully. Use a hot cast iron skillet, set the brats in, and let the casing blister into a golden snap while the fat sizzles around them.
Keep the heat steady so you stay in control and the sausage stays plump, not dry. Turn them often for even color and a rich, savory aroma that fills your kitchen and feels like a shared table.
Once the brats reach doneness, brush on a finishing glaze for shine and a sweet-savory kiss. You’ll get a satisfying bite, juicy center, and that familiar bratwurst comfort that you can proudly serve tonight.
Simmer Then Brown
Whenever you want brats with a tender, juicy center and a nicely browned casing, simmer them first and then finish them in a hot skillet. You’ll keep the casing intact while the links heat through gently, then you’ll build that crave-worthy snap with quick browning. Use pan simmering with a little water, beer, or broth, just enough to steam without splitting the skin.
Finish with a brief sear, and the fat will kiss the pan.
- Tiny bubbles nudging golden links
- Steam carrying a malty aroma
- Casing tightening into a glossy snap
- Sauce glazing clinging like a savory sheen
This two-step method helps you serve brats that feel familiar, hearty, and made for sharing at the table.
How to Cook Juicy Brats Every Time
To keep your brats juicy, cook them over gentle, indirect heat so the casing browns without scorching.
Don’t let the skin split—move the sausages to a cooler spot when they start to burst, and avoid high heat that can dry out the meat.
Check the internal temperature with a thermometer, and pull them at 160°F for tender, flavorful brats every time.
Choose The Right Heat
For juicy brats, the right heat matters more than speed: start them over indirect heat or a moderate grill so the casing doesn’t burst or burn while the inside cooks through. You’ll keep season control and heat balance, letting the sausage warm evenly and stay plump. Consider gentle warmth, not a furious flame.
- A pale brat resting beside glowing coals
- Wisps of smoke curling around a glossy casing
- Golden browning building slowly across the links
- A knife-free bite that releases savory juices
When you cook with patience, you join the crowd that knows a brat should snap, not dry out. Move them only as needed, and let the heat do its quiet work.
Prevent Casing Splitting
Should you want juicy brats without split casings, keep the heat steady and never rush the cook. You’ll protect that tender snap via using gentle temperature control, letting the sausage warm gradually instead of shocking the skin.
Start over indirect heat or a low pan setting so the casing can adjust as the fat melts and the brat plumps. That slow casing expansion helps the skin stay intact while the juices stay locked inside.
Should the grill be crowded or flames blast it, the outside tightens too fast and splits. Give each brat space, turn it only when needed, and move it to a cooler spot should you see bubbling or stress.
Do that, and you’ll serve a glossy, mouthwatering brat your crowd can trust and love.
Check Internal Temperature
Want juicy brats every time? Slide a meat thermometer into the thickest brat, away from the casing, and watch for 160°F. That doneness check tells you the sausage is safe, tender, and still bursting with savory juices. You’ll fit right in with grill lovers when you skip guesswork and trust the numbers.
- A glossy casing that gives under gentle pressure
- Steam rising with a rich, smoky aroma
- Juices sizzling, not spilling, onto the grates
- A plump brat with a firm, springy bite
When you hit temperature, pull the brats and rest them briefly. The casing stays snappy, the filling stays moist, and every bite tastes like you cooked with confidence and care.
Frequently Asked Questions
Can Brat Casings Be Eaten Safely?
Yes, brat casings are usually safe to eat, and they give you that satisfying snap. About 15 to 20 minutes of gentle grilling helps keep the juices in. Check the casing first, since a natural edible casing should feel firm, not tough.
Are Natural and Synthetic Casings Cooked the Same?
No, natural and synthetic casings do not cook exactly the same. Their materials change how much snap and tenderness you get, so use gentle heat, indirect grilling, and steady turning to keep brats juicy and appealing.
Do Smoked Brats Need Casing Removed First?
No, you do not need to remove the casing. It helps keep the brat juicy and gives each bite a firm snap with more flavor.
Can I Cook Brats From Frozen With Casing On?
Yes, you can cook frozen brats with the casing on. Start them over low, indirect heat so the outside does not scorch before the center warms through, then finish over higher heat to brown the casing and give it a crisp snap.
What Temperature Makes Brat Casing Turn Tough?
Above 160°F, brat casing can turn tough, especially over hot grill flames. Use a gentle simmer, then check the internal temperature for juicy, snappy brats.